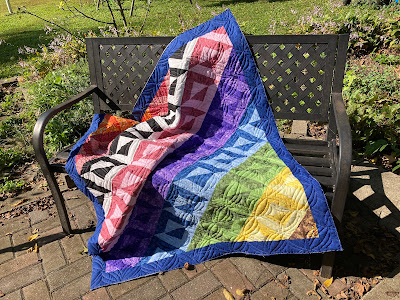
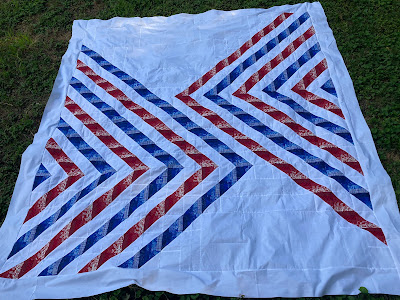
Another quilt top made by Emerald, commissioned by Natasha and quilted by me using a medium gray thread on top and dark gray on the back. The pantograph I used was one I bought specifically for this quilt called, "Diamonds are Forever" by Urban Elementz. Batting is 100% polyester which gives a lot of loft. This design is one that a couple of my kids say I should duplicate for a grandchild quilt.
Sunday, October 30, 2022
Saturday, October 29, 2022
Emerald's Yellow 4-pointed Stars on Navy Blue Sky Quilt
A quilt my sister, Emerald, made. I quilted it with dark gray thread on front and back.
The pantograph I used was bought specifically for this quilt. "Jessica's Twinkle" by Urban Elementz was a perfect match for these 4-pointed stars. Batting in 100% polyester which gives a lot of loft.
Sunday, October 16, 2022
How I Make a Quilt Label - Tutorial
I was asked how I made a quilt label, so this is what I do. I don't have an inkjet printer, nor does my sewing machine have a fancy stitch that works well, so I'm just doing it the way I can. Here it is.
I start by printing what I want to put on the label on regular paper. Most important things to include would be the maker, the quilter, where, when, and any important information that generations later would want to know. You could name the quilt, add who commissioned it and why. I'm showing the minimum.
I then, using a light table or taping it to a window, place some white or muslin fabric over and trace my words carefully using fabric markers.
I then trim, leaving a minimum of 1/2" on all sides. With 1/4" seam allowance, that leaves 1/4" around the lettering.
I then iron the seam allowances. There are two ways I use regularly.
One is to iron all 4 sides, like the one on the far left and the one I'm currently ironing and then sew on the back of the quilt. The other way is to iron only the top and right side of the label as I did in the top and middle label shown below.
Then, before the binding is sewn on, pin the label on the bottom left-hand side of the back. This is the same as the back of the bottom right-hand side of the front. (Sounds more confusing than it is).
I then hand stitch the ironed edges (top and right) using a ladder or invisible stitch. A whip stitch could work, too, if you're not comfortable with the other.
The invisible/ladder stitch is done by taking a small stitch on one fabric (above) and then a small stitch on the other fabric, right on the fold as shown below. Make sure you just go through the backing fabric since you don't want the stitch to show on the front.
Repeat until all sewn. Bind as usual. My preference (as shown below) is to sew my binding to the back first, then fold over to the front and do a top stitch close to the folded edge.
And it's done with less hand sewing.
Friday, October 14, 2022
Lola's Green/Blue/Purple Scrap Quilt for Refugees
This is another quilt top Lola made to provide warmth for the refugees. I quilted it with a large meandering ribbon pattern, though maybe I should have made the meander a little smaller and closer together to account for and take up the excessive fullness on the two borders.
The back and binding are scrappy.
Tuesday, October 4, 2022
Pat's T-shirts and More Memory Quilts
After the passing of Pat's husband, her friend, Sue, offered to make quilts for her (Pat's) 3 children from the plethora of t-shirts he wore.
I was asked to quilt them in a way that would not detract from the shirts. I used a large over-all meander in the clear MonoPoly thread on top, with Pacific Blue Glide 60 thread on the bottom.
Sunday, October 2, 2022
Lola's Pink Purple Blue Green Scrap Quilt for Refugees
This scrappy quilt top was made by my sister, Lola who wanted to help the refugees as well.
I did a freehand (free-motion) quilt design on this using a lavender Glide Thread on top and a light gray Glide 60 on the bottom.
The binding was a scrappy binding using the leftover back fabric. The finished top (above) and the finished back (below).


