Pricing

Long Arm Quilting/ Sewing or Quilting Lessons / Custom Made Items
I am a long arm quilter with rates starting at $.018/square inch. Most edge to edge designs are $.021/square inch. My prices include set up, thread, needles, etc. I make commissioned quilts with rates at $20/hour.
I also teach Private Sewing Lessons in the St. Louis area. Cost is $50/hour.
Please e-mail me with any questions, to have your quilt top quilted, to set up sewing lessons, or regarding having something custom made, at showmesewing@gmail.com.


Tuesday, November 29, 2022

Two Jinny Beyer's Garden Maze Quilts - Custom Quilting


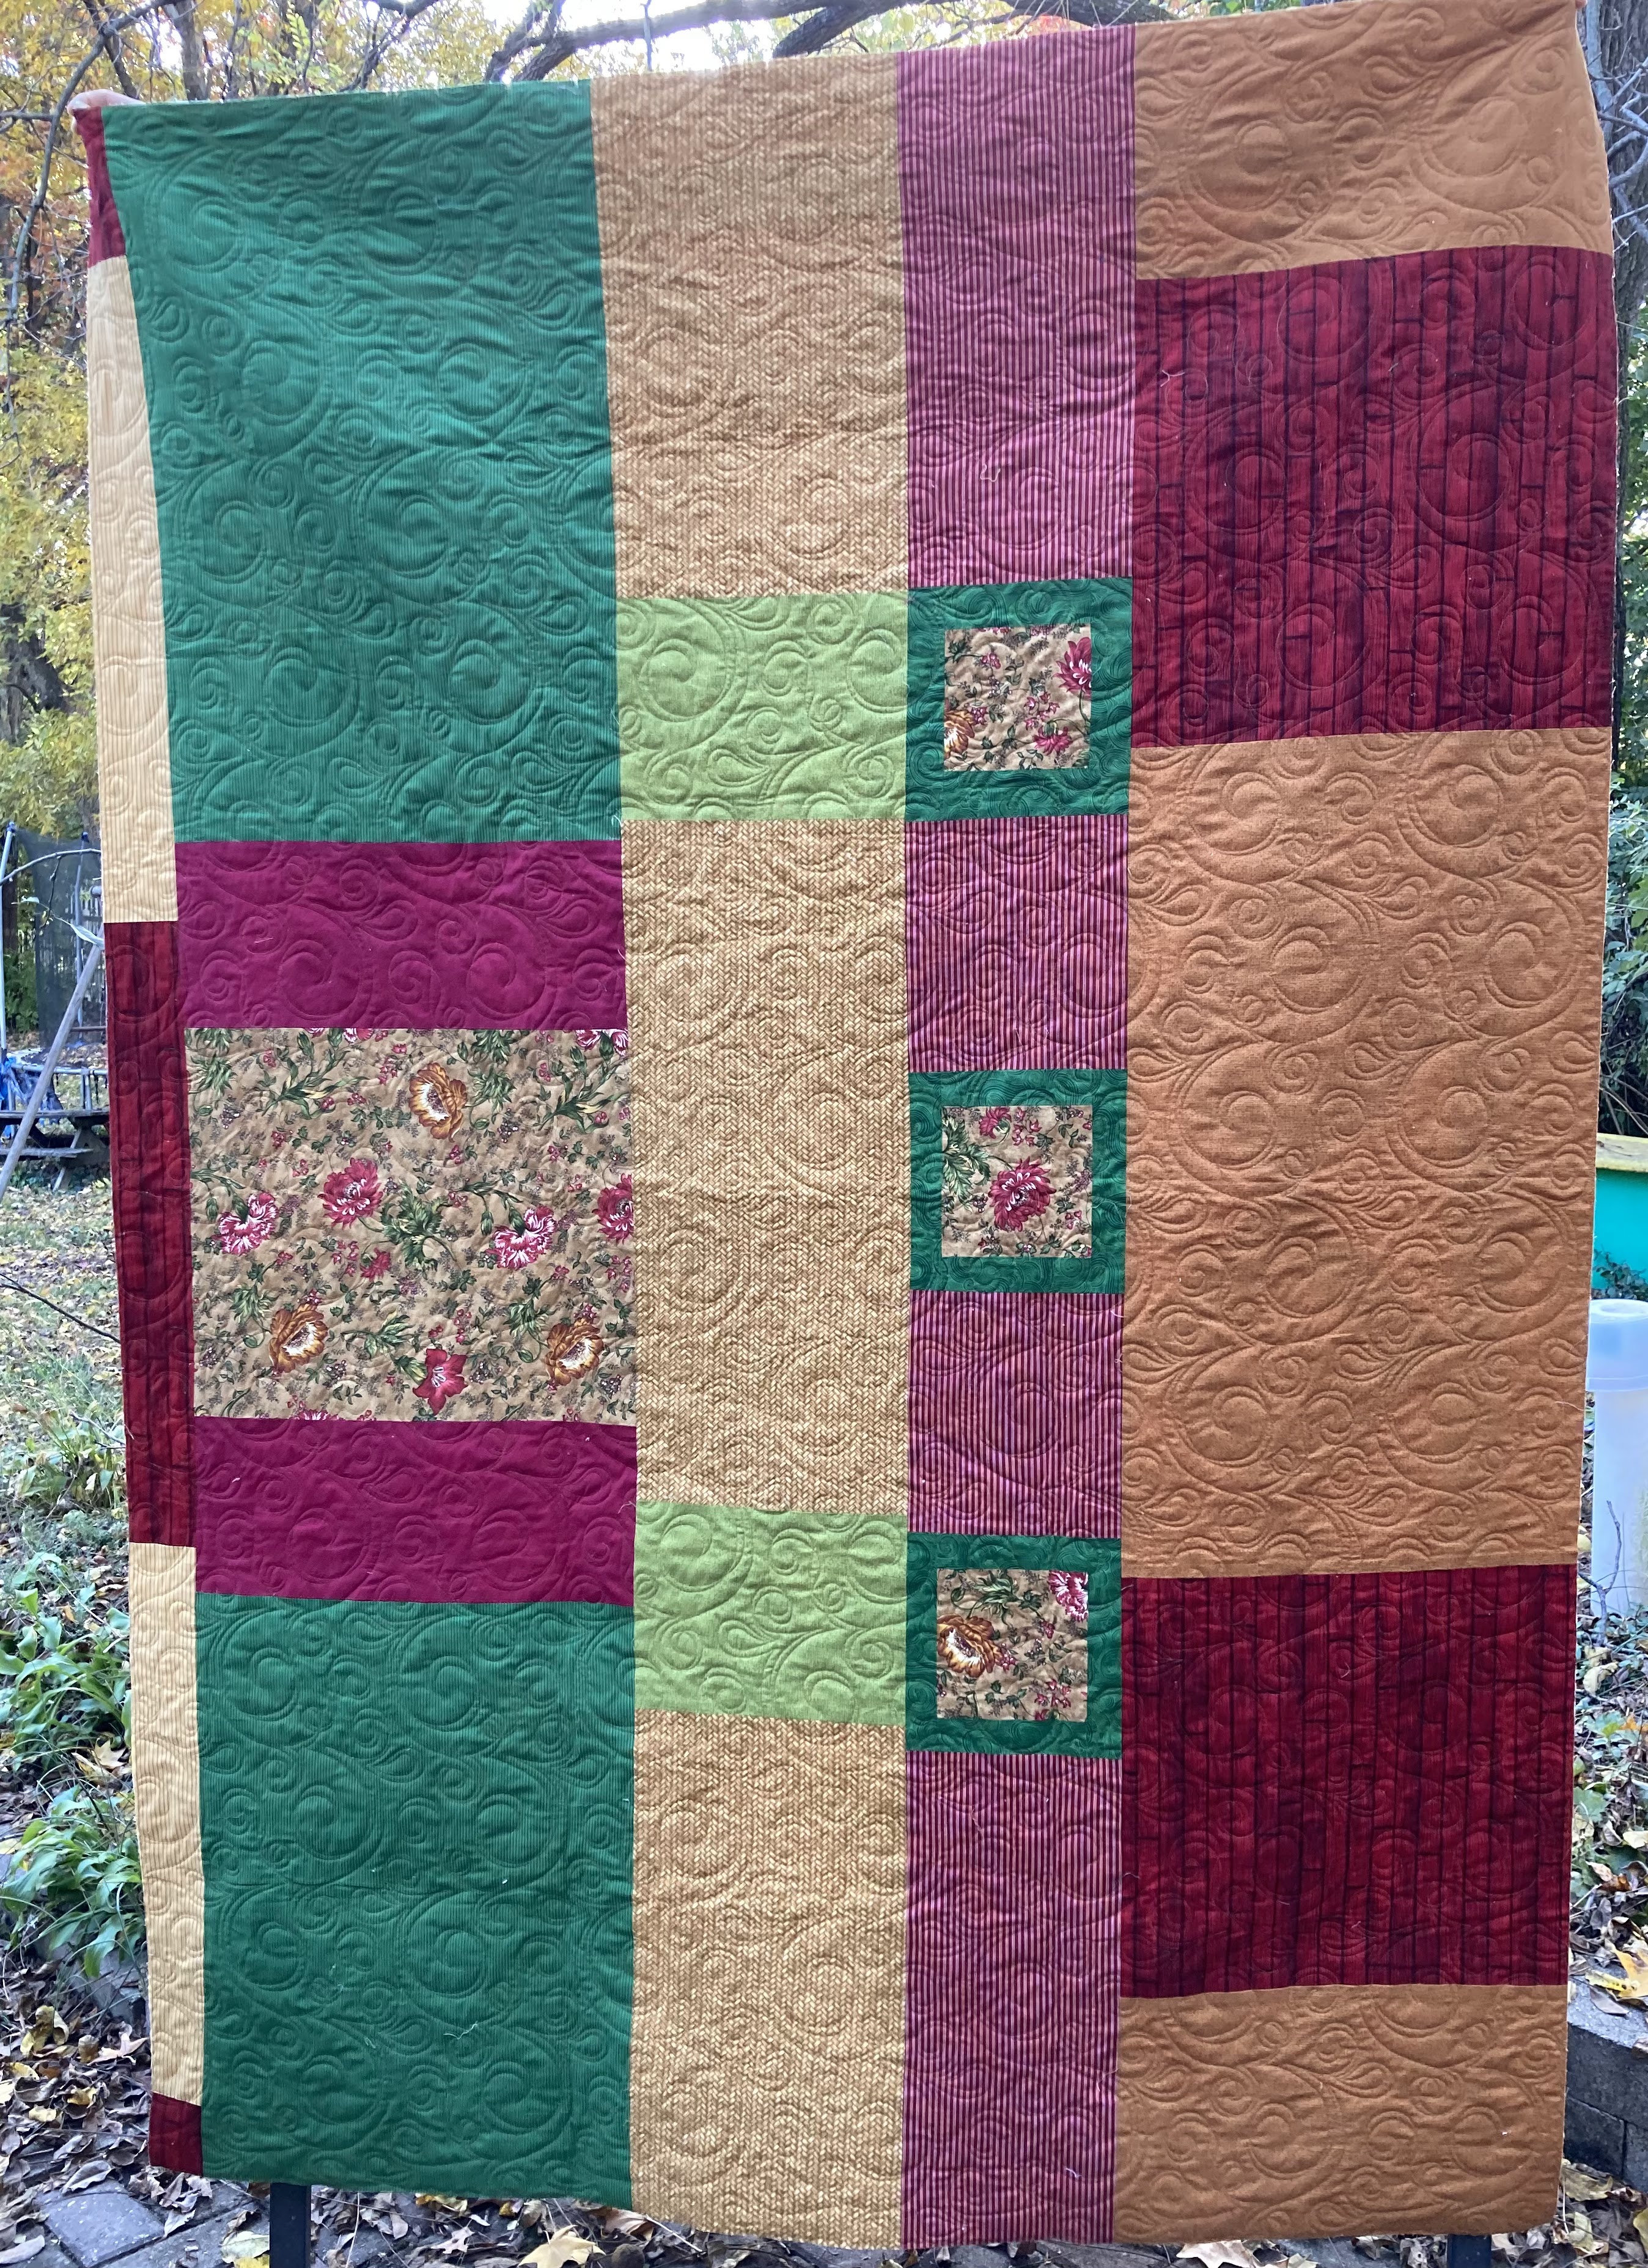
The first quilt (Joan's).


Three quilting friends, who happened to be cousins, bought matching Jinny Beyer Garden Maze quilt kits to make together. Phyllis finished hers several years ago. Patty and Joan were almost finished with theirs when progress was stopped by several family members passing away, including Patty. 


Now, years later, Phyllis has finished Patty's (all that was left to do was sew the outer border on it), and Joan has finished hers.


Since Phyllis' was already quilted, and they wanted Patty's and Joan's quilts done the same way, but the longarm quilter who quilted Phyllis' quilt was no longer around to do it.


They found my name at a local quilt shop and contacted me to do it. I, of course, was more than happy to do so.


They brought me Phyllis' quilt so that I could duplicate the quilting on the other two quilts.


Each flower is stitched around with the feathers and fill in the black.


My threads were not exactly the same as the original, but I think it worked out equally well, and I didn't have to change threads on the back as the first quilter did.


In the sashing, there is straight line stitching the black, elongated hexagon, echo stitching around that hexagon, as well as stitching down each side of the the stripes in the center area.


Here's a look at the borders, quilted in black thread. 


All the stitch-in-the-ditch (SID) work took longer than doing all the feathers in the blocks, borders and triangle pieces. So when someone says they just want something easy, like SID, know that that is not as easy on a machine as it is while hand quilting. No one's straight lines in piecing are perfectly straight. Therefore, when using a perfectly straight ruler and trying to duplicate the not quite straight lines, it ends up looking like the quilting is not straight instead of the piecing, thus giving the LAQ (longarm quilter) more work to make it look right.


And the second quilt (Patty's). Because of the direction of the sun, the colors seem washed out in the photos. They aren't in real life - washed out, that is. They are bright and vibrant on a black background.


Comparison of the one I was copying and the second one I did. My quilting is on the left in each of the following pictures and the one I was duplicating is on the right.


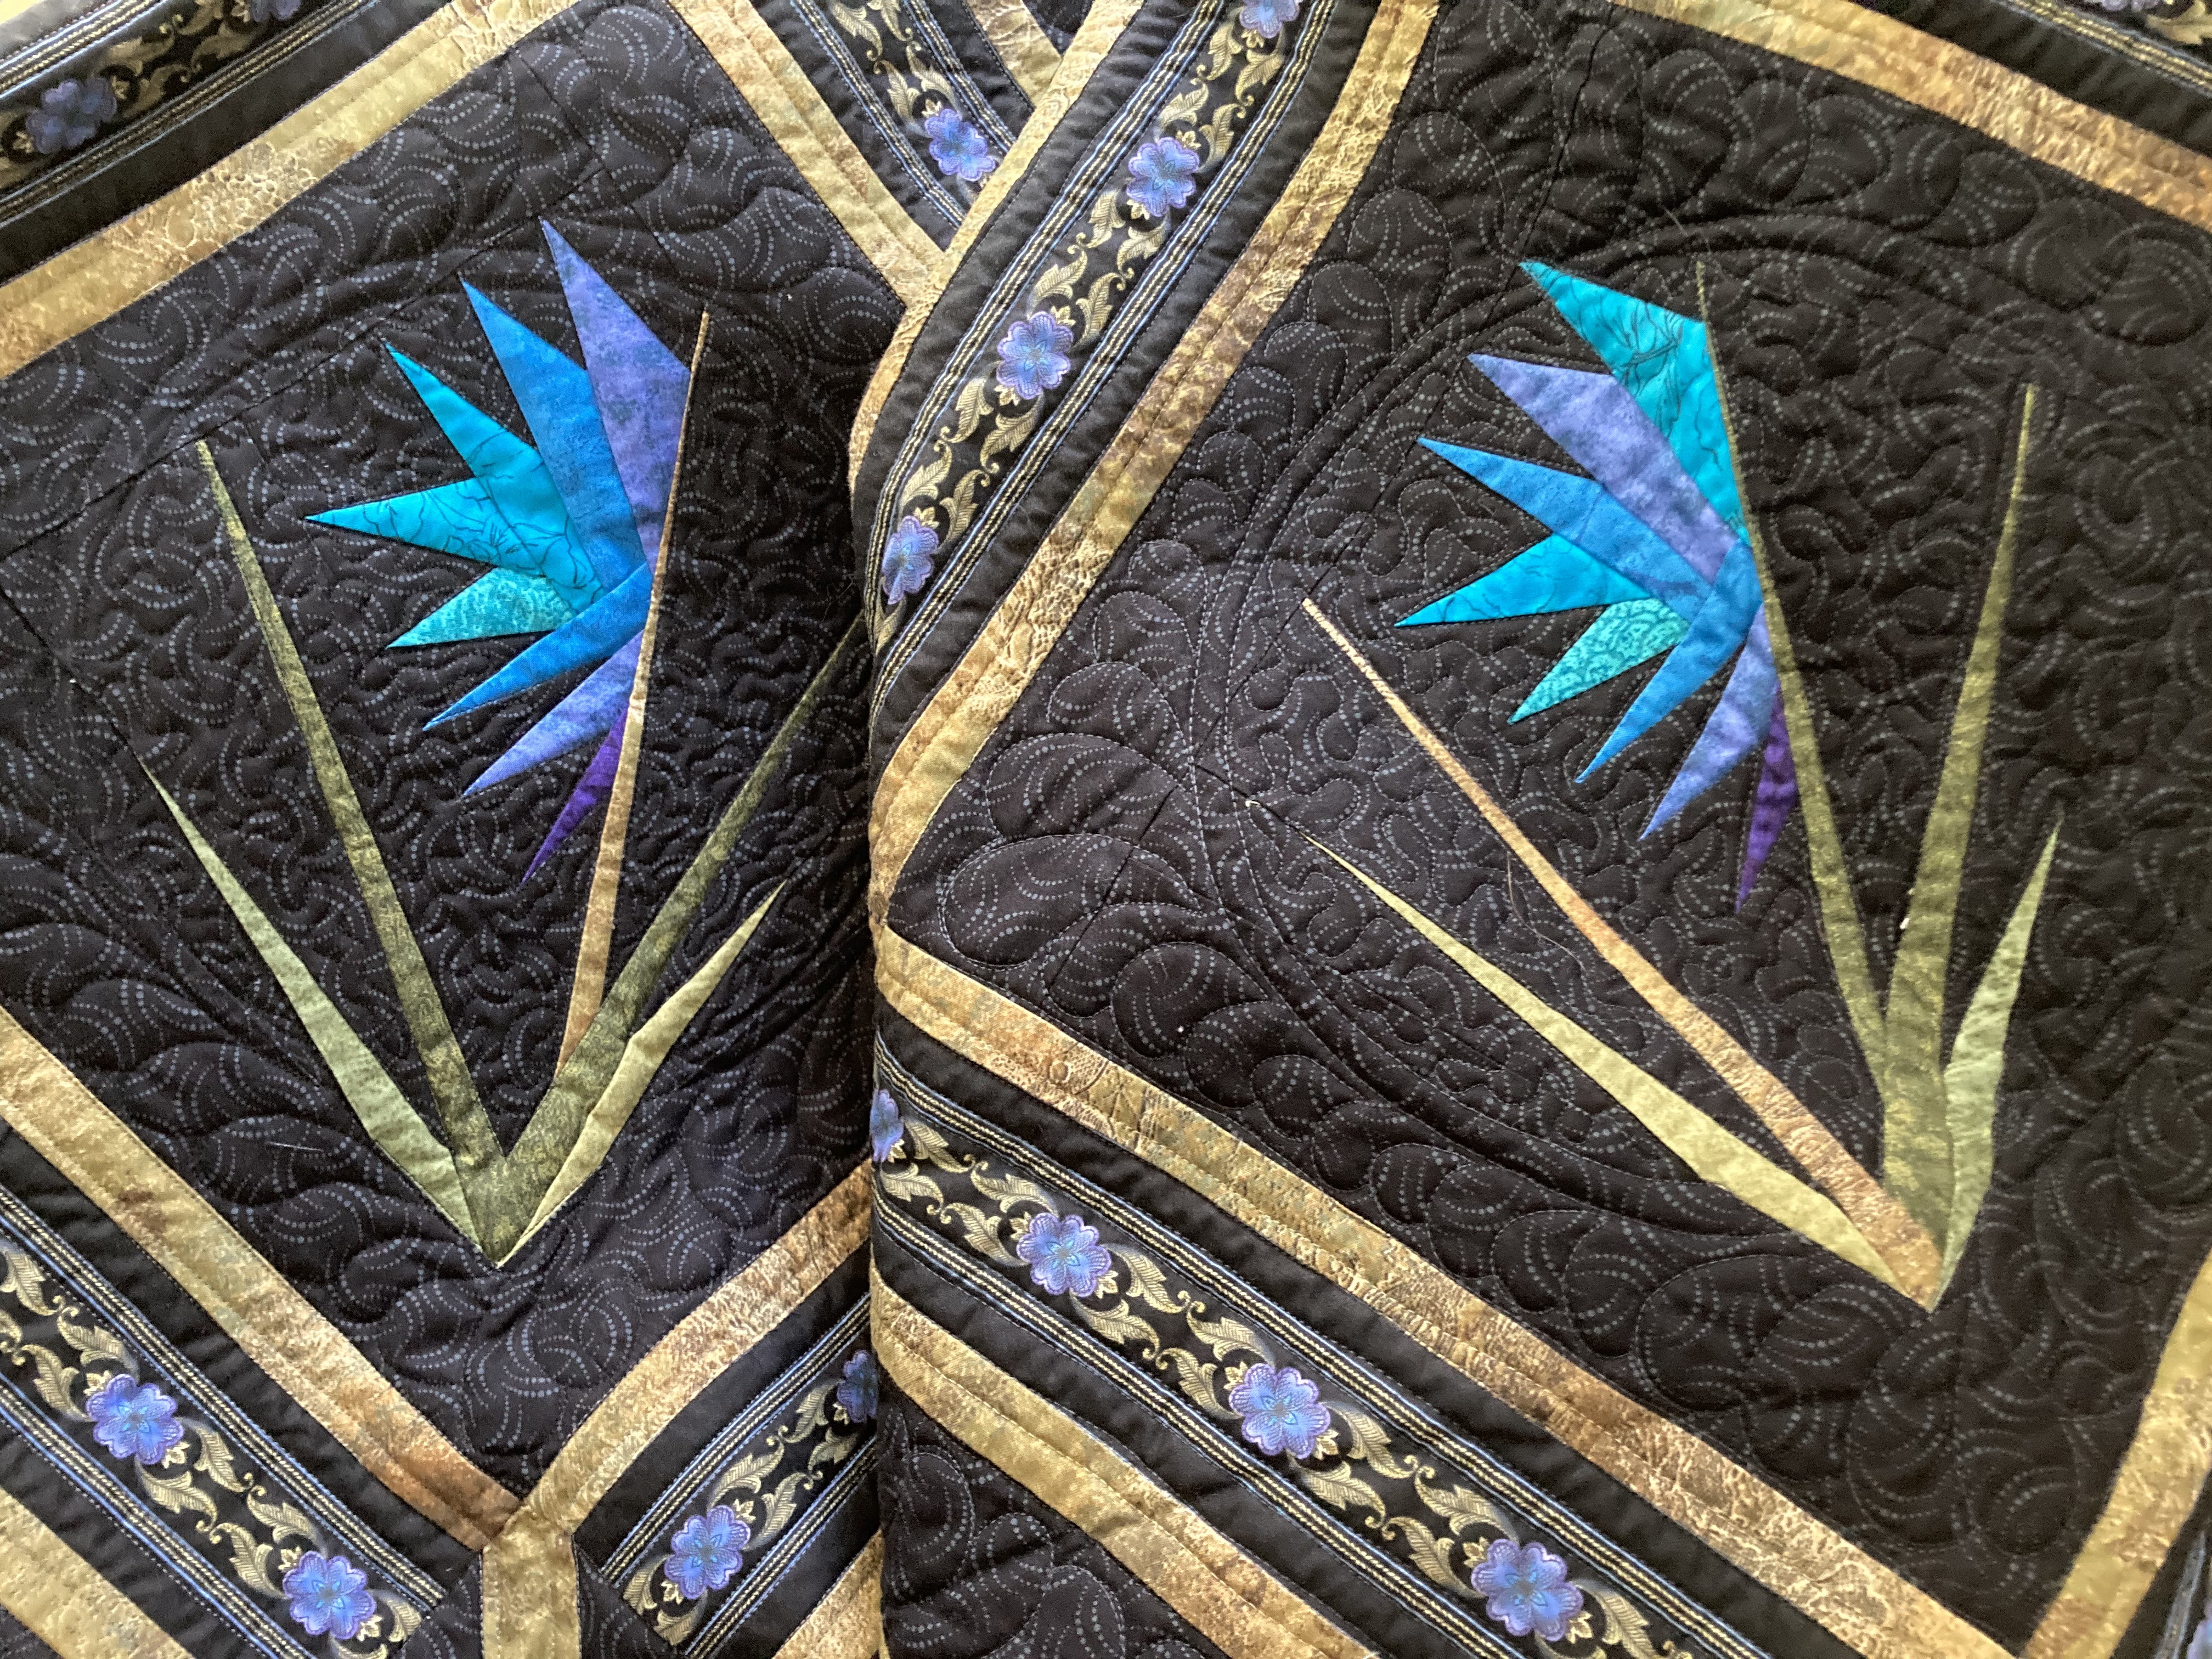
Here you might see that my threads were a medium gray and a black on top with a dark gray thread on the back. The original had a tan and dark gray on the front with the same colors on the back. 


The original (Phyllis's).
 

Saturday, November 12, 2022

Dorothy's Christmas Quilt in Red, Green, Gold, Tan


Dorothy made another quilt which she plans to keep for herself. I don't know if she planned for it to look Christmas-y, but to me, the colors said Christmas so I'm calling it so. The nice thing about this is the pattern and fabrics worked for any time of the year.


As I looked at the top and thought about it, it hit me that Espresso from Urban Elementz would be beautiful on this in a gold (Glide Cleopatra) thread. The more I looked at other options, the more I was sure that that is how it should be done. She said she trusted my judgement, so I bought the pantograph.


I can't even tell you how much I love how it turned out! It was definately the perfect pattern for the quilting. The thread on the back was Glide 60 Military Gold.

Monday, November 7, 2022

Thimble and Thread Guild Purple, Blue, Green, and Yellow Large Squares Charity Quilt


Charity quilt I quilted for my quilt guild, Thimble and Thread, who donate to "Sweet Babies" and "Home Sweet Home" charities. I assume that all those quilts I've quilted for them have gone to "Home Sweet Home" since I haven't done any baby quilts for them.


I used the Espresso pantograph by Urban Elementz (which I really like), with purple (Grape) Glide thread which I really liked on all the colors but the yellow where the contrast was too stark for my taste.


But, that's one of the nice things about charity quilts. It gives you a chance to try different things out and decide whether or not it's something you would do again.

Friday, November 4, 2022

Thimble and Thread Charity Quilt in Red, White and Blue


 Another charity quilt I quilted for The Thimble and Thread quilt Guild. I practiced my new Diamonds are Forever pantograph by Urban Elementz and quilted in Candy Apple Glide/Glide 60 thread.


Normally I wouldn't choose a darker than the fabric thread, but the red disappeared on the red fabric, blended OK on the white print and absolutely shone on the blue. It turned out great!

Sunday, October 30, 2022

Emerald's Two Toned Rainbow Diamond HST Quilt


Another quilt top made by Emerald, commissioned by Natasha and quilted by me using a medium gray thread on top and dark gray on the back. The pantograph I used was one I bought specifically for this quilt called, "Diamonds are Forever" by Urban Elementz. Batting is 100% polyester which gives a lot of loft. This design is one that a couple of my kids say I should duplicate for a grandchild quilt.
 

Saturday, October 29, 2022

Emerald's Yellow 4-pointed Stars on Navy Blue Sky Quilt


A quilt my sister, Emerald, made. I quilted it with dark gray thread on front and back. 
 

The pantograph I used was bought specifically for this quilt. "Jessica's Twinkle" by Urban Elementz was a perfect match for these 4-pointed stars. Batting in 100% polyester which gives a lot of loft.

Sunday, October 16, 2022

How I Make a Quilt Label - Tutorial

I was asked how I made a quilt label, so this is what I do. I don't have an inkjet printer, nor does my sewing machine have a fancy stitch that works well, so I'm just doing it the way I can. Here it is.


I start by printing what I want to put on the label on regular paper. Most important things to include would be the maker, the quilter, where, when, and any important information that generations later would want to know. You could name the quilt, add who commissioned it and why. I'm showing the minimum.


I then, using a light table or taping it to a window, place some white or muslin fabric over and trace my words carefully using fabric markers.


I then trim, leaving a minimum of 1/2" on all sides. With 1/4" seam allowance, that leaves 1/4" around the lettering.


I then iron the seam allowances. There are two ways I use regularly. 


One is to iron all 4 sides, like the one on the far left and the one I'm currently ironing and then sew on the back of the quilt. The other way is to iron only the top and right side of the label as I did in the top and middle label shown below.


Then, before the binding is sewn on, pin the label on the bottom left-hand side of the back. This is the same as the back of the bottom right-hand side of the front. (Sounds more confusing than it is).


I then hand stitch the ironed edges (top and right) using a ladder or invisible stitch. A whip stitch could work, too, if you're not comfortable with the other.


The invisible/ladder stitch is done by taking a small stitch on one fabric (above) and then a small stitch on the other fabric, right on the fold as shown below. Make sure you just go through the backing fabric since you don't want the stitch to show on the front.


Repeat until all sewn. Bind as usual. My preference (as shown below) is to sew my binding to the back first, then fold over to the front and do a top stitch close to the folded edge.


And it's done with less hand sewing.