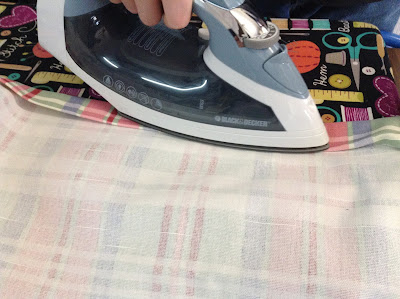
This is a laundry bag made for my daughter many long years ago. I was using fabric I had on hand, and she wasn't too thrilled at the bright, bold fabric, so we switched it and made it with the wrong side of the fabric out (as if it were the right side) to give it a subtle plaid look. She like it better, but it can make the instructions a bit confusing as it looks backwards from what is normal.
*****I didn't take a picture of cutting out the fabric, but they are cut the size you want the finished piece plus seam allowances. ********
There are many sizes of laundry bags. This one finishes at 25"x30". Another size I've made is 26"x44".
Allow 3/4" for each french seam (sides and bottom)
Allow 1-1/2" for the top seam
I chose to do french seams for two reasons, durability - since each seam is sewn twice and protecting the seams so they don't fray. To do this, I sewed the pieces with RIGHT SIDES TOGETHER at 1/4" (remember the white side is my "right side"). Then turn it inside out, pushing the corners out nice and square and the finger press the seams close to the stitching, and sew 3/8" from the edge. This will keep the raw edges inside. See below.
Next will be preparing the casing at the top. I press the edge down 1/2" from the top. I have found for long areas that need a precise fold, I cut a strip of card stock to the correct width, (in this case, 1/2"x11") and press the cloth over the strip of card stock.
You can see it better in this picture. I line up the edge of the fabric with the edge of the card stock, keeping the folded edge snug to the card stock.
Then fold again and press 1" from the first fold. Here I have a 1" strip of card stock that I tuck into the 1/2" fold and fold again, giving the casing area a very crips and exact measurement.
Before you sew the casing closed, we need a hole to put the string through. I used a grommet, though if that's not to your liking, you could use a buttonhole or some other method.
Center the grommet in both the front and within the 1" part of the casing. Draw a circle in the center of the grommet (see below).
Cut a little snip in the middle. . .
to get your scissors inside to cut out the circle.
Very carefully cut out the center. I go a wee bit inside that line. . .
because I want the grommet to be nice and snug in that hole. Secure the grommet according to package directions. If you prefer to have two strings to close the top, repeat making a hole directly across from the first hole centered on the back side of the laundry bag within the casing as before.
Remember that the white side of my fabric is the "right" side (because I know if you're just flipping through the pictures, it's deceptive - it throws me off and I made it). Stitch nice and close (1/8" or less) from that folded edge.
String your string or strings through and you're done.
I've made a bunch of these. Good for teens or college age students that do their own laundry.
I like to embroider the name on it.
I'll be making more this Christmas, too.


No comments:
Post a Comment