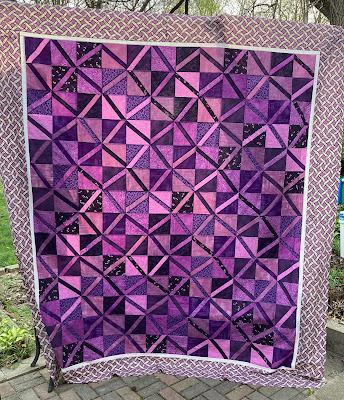
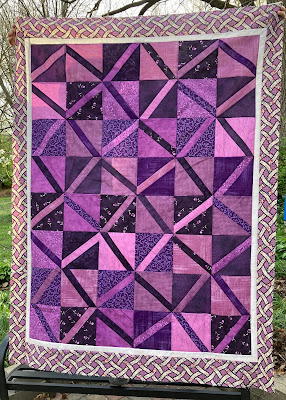
I keep a running list of quilts to make and it often takes years for me to get around to making them. This is one I designed over 12 years ago. If Porter, my 7th child, had been a girl, this was the one I planned to make him. So it was to be made for my 8th child that never happened. When I decided to make both a baby quilt and matching queen/king sized quilt for my grandchildren, as I had my own kids, I figured I’d still make it sometime.
I have 3 sets of tops for future grandkids on my to do list this year (which may be overly ambitious). This is the first set, finally done after years of planning and 3 months of work. I will quilt them when there’s a grandchild to receive them. Even though I just finished making these tops, my daughter has requested this for her daughter due in the fall.
This pattern was deceptively hard. That is because the center strip in each of the squares has to line up precisely where the seam is going to be, but because of the angle, that is not actually corner to corner from the cut edges. I’m proud of the pattern, but I don’t think I would choose to make this one again. I prefer patterns that look hard, but are really easy.
However, since there may be some that want to attempt this beauty, here is how you can make your own paper pieced pattern for this. This can be adjusted to any size finished block you wish to make. These blocks finished to 6" squares. There are many instructions on how to do paper piecing, so I will not go into that at this time. I used a reusable paper method (can be done with freezer paper, though I used my Xyron 900 to make my paper into stickers, which worked for me).
You will need two different patterns. The second is a mirror image of the first. Here's how you make it.
Draw a 6" square. Draw in seam allowance around the perimeter - I use 1/4" seam. I'm using graph paper to help show the sizing.
I found a ruler that was 1" wide, so I'm using that to draw my lines. I want the diagonal line to be 1" wide. You, of course, could choose a different width. The concept will be the same, though.
I want the diagonal line to match the corner of the INSIDE square with the edge of one side of the ruler, and the opposite corner to touch the other side of the ruler. You will notice that the line intersecting the corner of the inside square does NOT touch the corner of the outside square. That is as it should be. You will need a mirror image of this pattern.
For figuring out how many of each type of square I needed, I drew out my plan. As you can see I made alterations, but you can see some of my numbers and sketches. Each diamond is made of two darks with light stripes and two mirror image lights with dark stripes. There are vertical and horizontal diamonds. The vertical diamond will use (if looking at my little key under the drawn quilt below) the top left and bottom right squares, while the horizontal will use the top right and bottom left.
Hope that helps. As I said, this pattern was deceptively harder than I thought it should be. You have to keep your brain in gear. I found it helpful to sew them together as diamonds first and then arrange them on the floor or design wall. It's much too easy to pick up the wrong piece or lay them out in the wrong way. Ask me how I know. I'm not a fan of using my seam ripper. I would much rather it sit nicely in my drawer and leave me alone.


No comments:
Post a Comment