You know the old saying, "There's more than one way to skin a cat." Well, the same holds true for tying a quilt. "There's more than one way to tie a quilt" and I would like to share with you one of my favorites. "Why is it my favorite?" you may ask. Well, being lazy by nature, I don't like the tie and cut, tie and cut, tie and cut method because I don't like having to set down and pick up my scissors that often. I like to do one thing for a while and then go on to the next.
The problem I have with the method of taking all the stitches, cutting between each of them, and then tying them (though I prefer that to the first method above), is that I invariably forget to tie one and it gets pulled out by a child. In this method, you tie as you go.
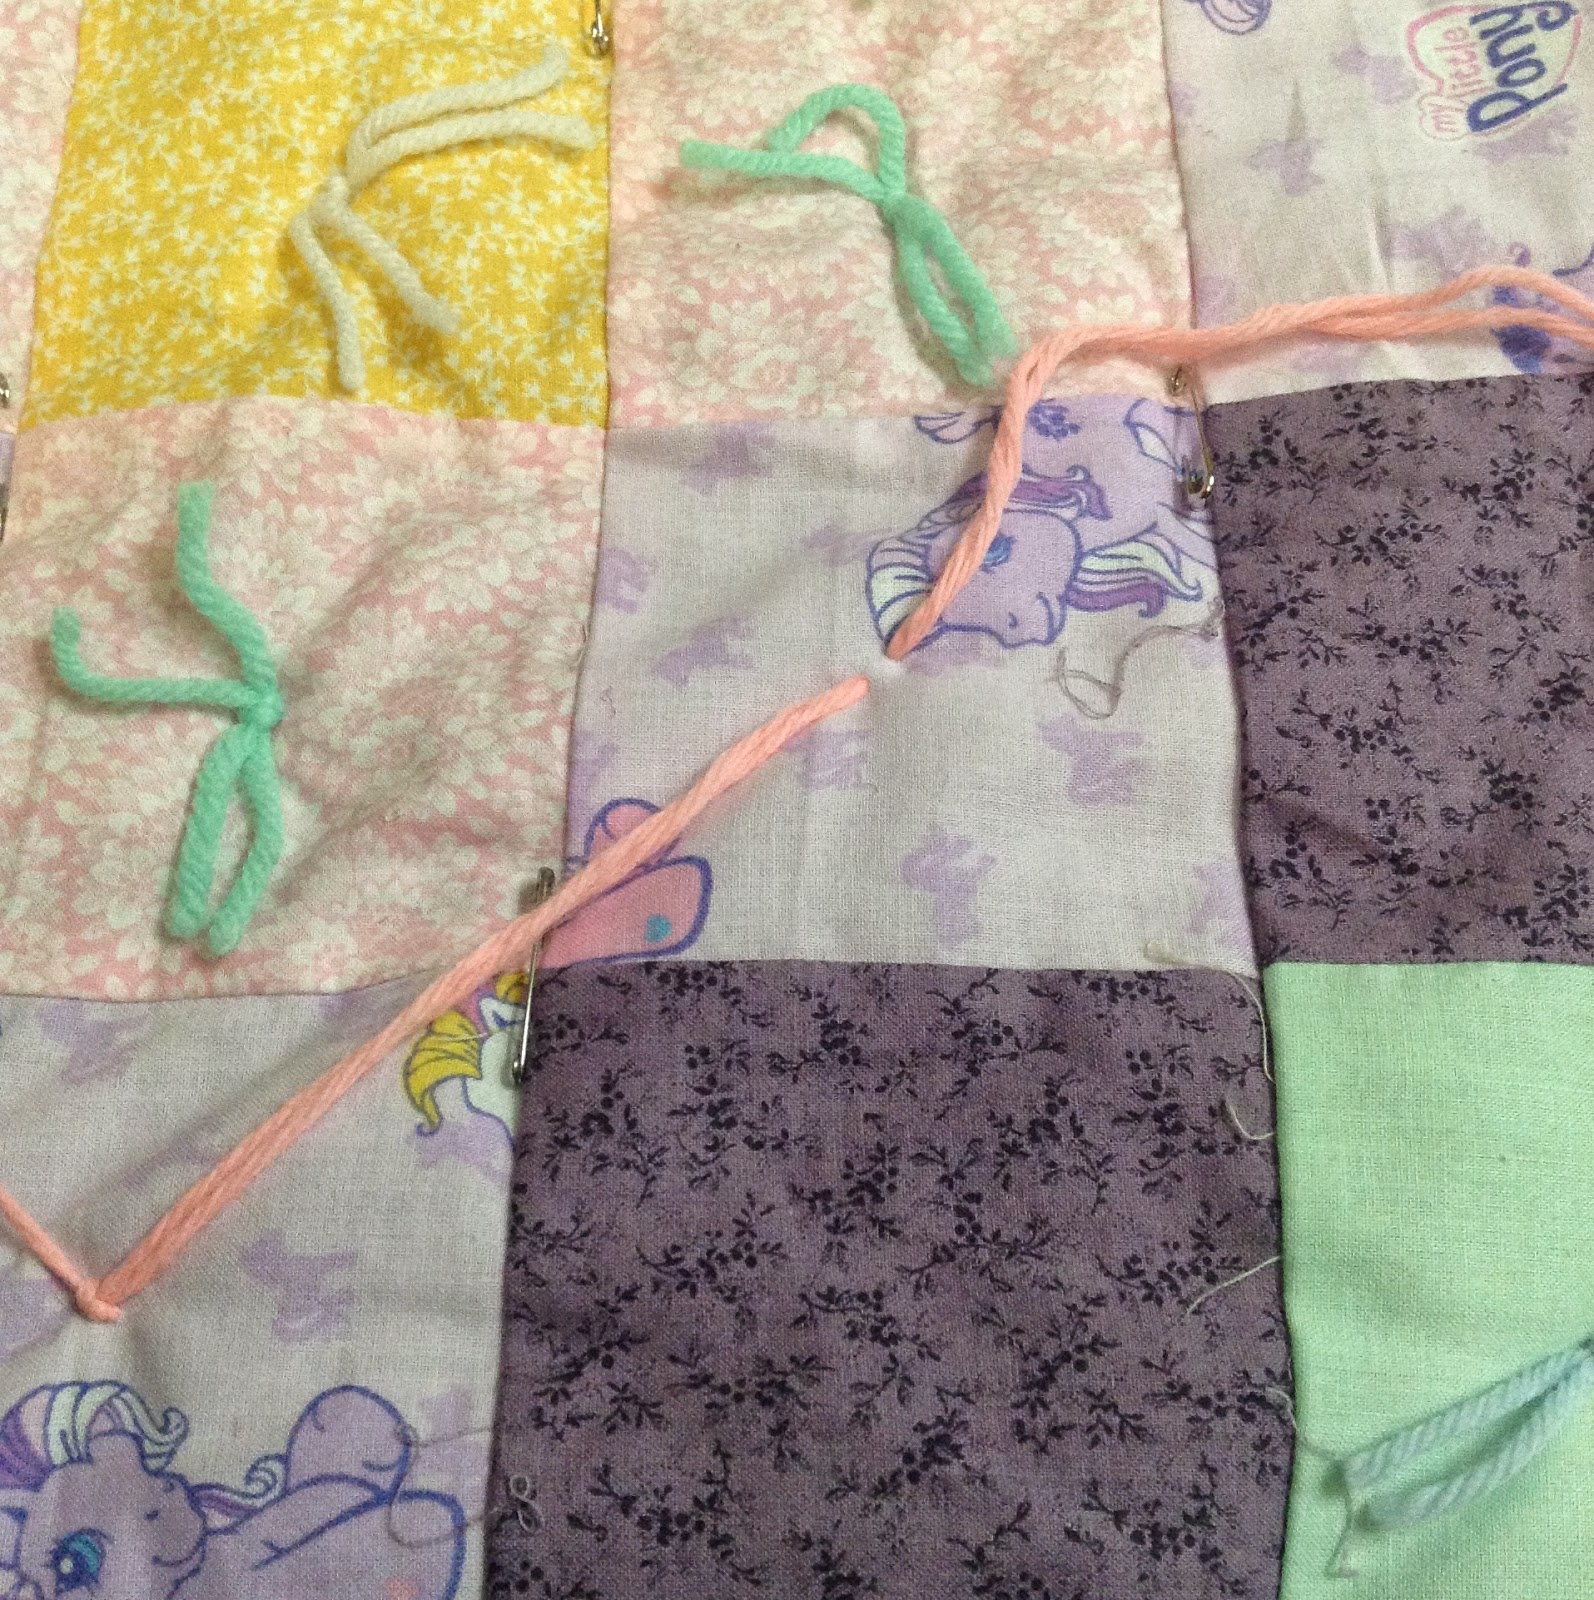
1. Start by taking a stitch and pull the yarn/floss or whatever you like to use a few inches from the end.

2. Tie a square knot. Remember that each time you tie a knot, it should be a square not and you need to pull equally from both sides.

3. Move to the next place and take a stitch.
4. Pull taut.
5. Tie the knot as follows:
Circle the yarn up and to the left.
Come under the taut line and over your circle.

6. Pull the first part of the knot tight. Though I don't show it (because my hand got in the way of me taking the picture), tighten the knot by pulling on both the needle end as well as the taut end.

7. Finish tying the knot:
Next circle the yarn down to the right (opposite the direction you went before).
Go under the taut string, and over the circle.
Think as you tie: "Circle Left, Under, Over. Circle Right, Under, Over."

8. Pull the knot tight. Remember to pull the yarn equally on both side of the knot.
9. Continue until you run out of yarn to tie a knot. Then Cut halfway between each knot and trim to the desired length.


 Cute dress in the Michael Miller fabrics Funfair and pink Ta Dot that my mother made for Trenna Travis Design Studio. The pattern is McCall's #M6945.
 Early March brought a slue of outfits that Trenna needed. I wish I had the time to make every one, but the turnaround time is such that I have to call in help from my sister and mother. The material was dropped off Friday afternoon and she needed all 7 things back by Tuesday afternoon. On weekends and after kids get home from school, I don't get much done, but Friday I started cutting this out, and got the top done on Saturday.


 This blouse Emerald made from the Michael Miller navy Veranda fabric for Trenna. It was made from the on-line only Burda pattern: Modell 107 Burda Style 12/2014.

 Little girl's dress I made for Trenna Travis Design Studio from the Michael Miller Fabrics: White Veranda with trim in Sweet Vine. Made with the Burda pattern #9470.

 The fun has begun again. We've been doing a lot of sewing and have another packed next 3 weeks. I will try and post when I can, but usually when I'm sewing gang-busters, I don't have much time to post. This is a dress I made from the Michael Miller Fanfare material for Trenna Travis Design Studio. We used a Burda pattern that was only available on-line. It's labeled as follows: Modell 133 Burda Style 8/2012.


 You are sewing along and come to a place where you need to remove
your sewing from the machine. You reach into your little box of pre-cut
pieces and sew a couple together, using these as your holder while you
remove your sewing project. When you begin sewing again, remove the
secondary project and put it off to the side.
You are sewing along and come to a place where you need to remove
your sewing from the machine. You reach into your little box of pre-cut
pieces and sew a couple together, using these as your holder while you
remove your sewing project. When you begin sewing again, remove the
secondary project and put it off to the side. The second photo is of a little plastic container I use to contain my secondary project. In this case, I began accumulating 1" strips - things that others were throwing away and I thought, "Surely something can be made from these!" I think that it's much easier to do this if the secondary project is purely scrappy in design. You don't want to have to keep two projects in mind and remember which one you are working on.
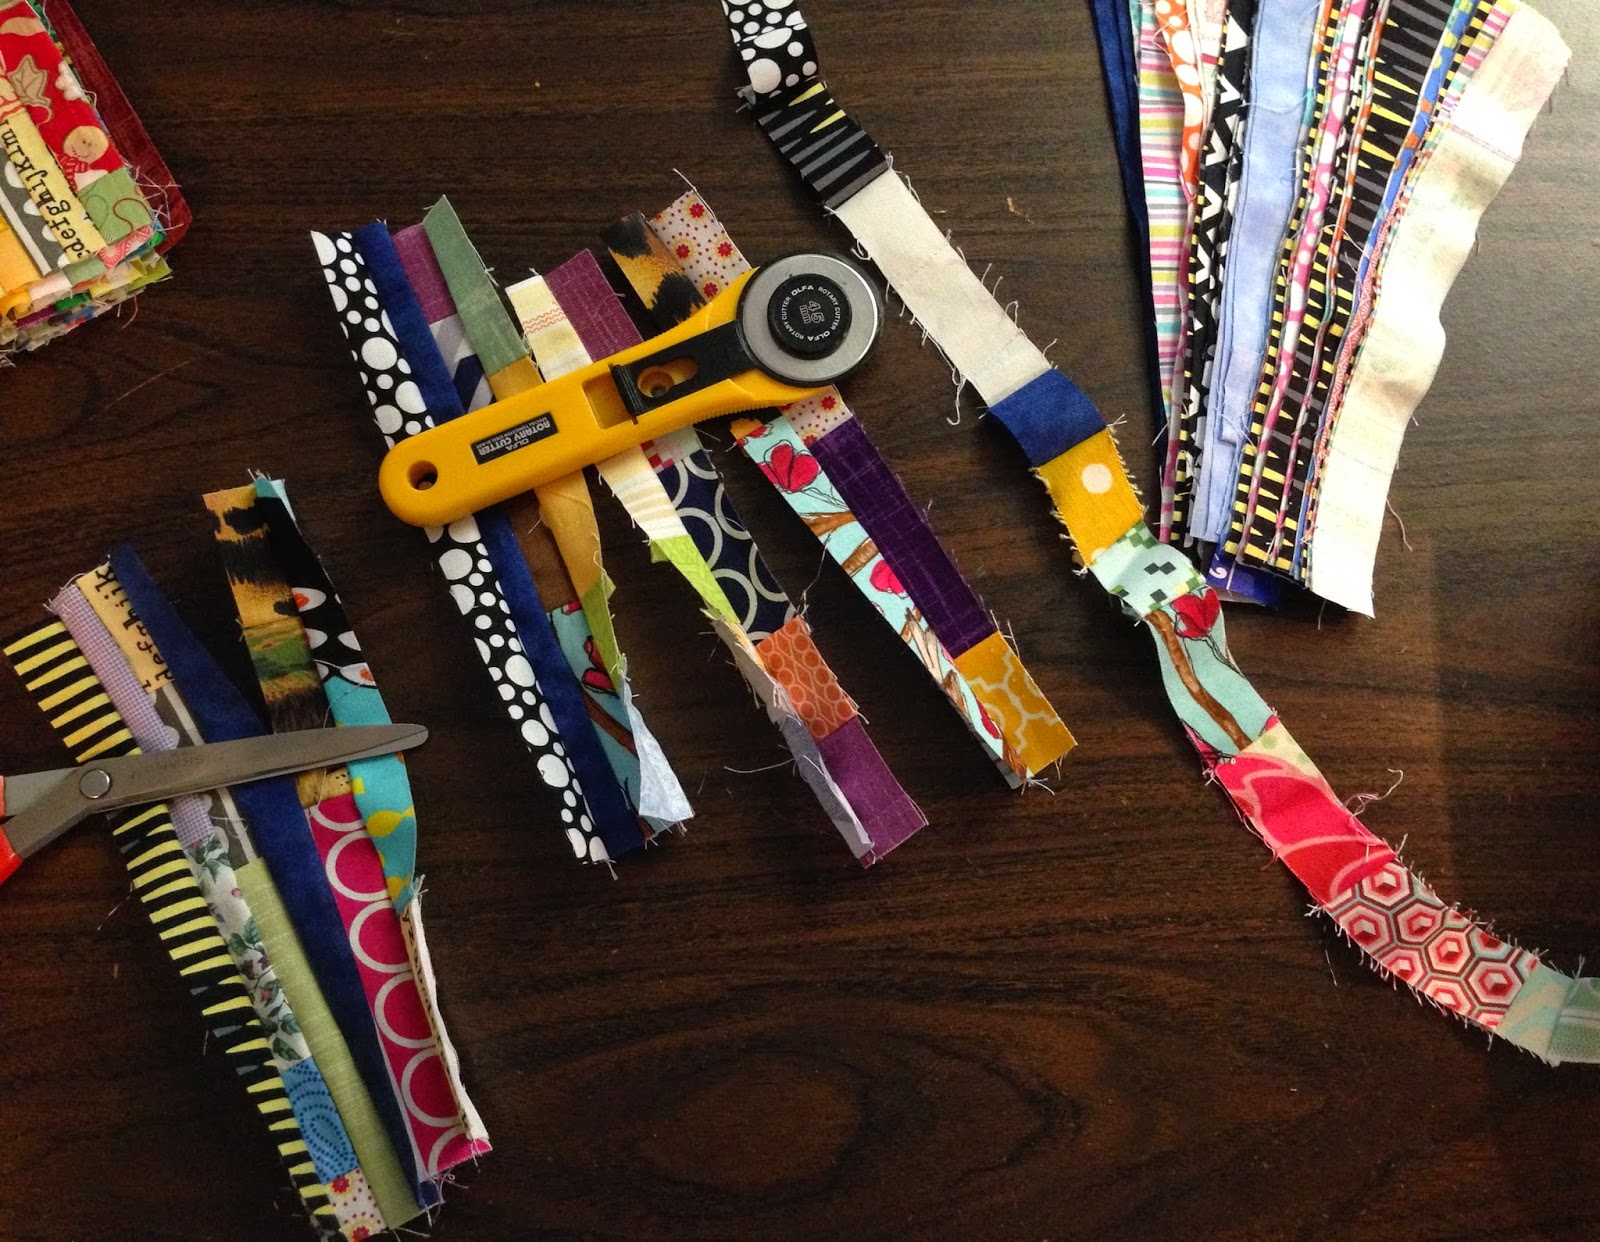


 Made from the Michael Miller Clipdot fabric line in the color "Midnite" for Trenna Travis Design Studio. I made this back in July 2014 and appears in the Fall Catalog.