Pricing

Long Arm Quilting/ Sewing or Quilting Lessons / Custom Made Items
I am a long arm quilter with rates starting at $.018/square inch. Most edge to edge designs are $.021/square inch. My prices include set up, thread, needles, etc. I make commissioned quilts with rates at $20/hour.
I also teach Private Sewing Lessons in the St. Louis area. Cost is $50/hour.
Please e-mail me with any questions, to have your quilt top quilted, to set up sewing lessons, or regarding having something custom made, at showmesewing@gmail.com.


Monday, December 30, 2024

Jeanette's Chandelier Quilt


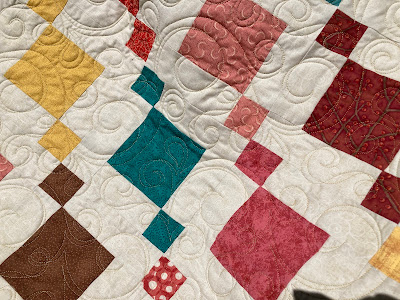
This Chandelier beauty was made by Jeanette for a wedding gift (lucky couple!) and she asked for the quilting to be curvy or flow-y, not geometric.


I chose Espresso (from Urban Elementz) and Cleopatra gold thread for the top and cream thread on the back (Glide and Glide 60 respectively).

Thursday, December 26, 2024

Tulip Applique Charity Quilt in Yellow, Cream and Gray


This charity quilt top was donated by Gail. I’m not sure where she found it but it was all hand sewn!


I made a scrappy back for it and then quilted it to death (with cream Glide/Glide 60 thread).


I tried to keep my quilting patterns consistent with the era it was made (even if I used a longarm to machine quilt it - a rather modern invention). I like the way it turned out. Should keep a refugee warm this winter.


Sunday, December 22, 2024

Dorothy's Masculine Quilt in Plaids


Great masculine quilt by Dorothy.


I quilted it in Mossy green Glide and Glide 60 thread using the Zest pantograph from Urban Elementz.


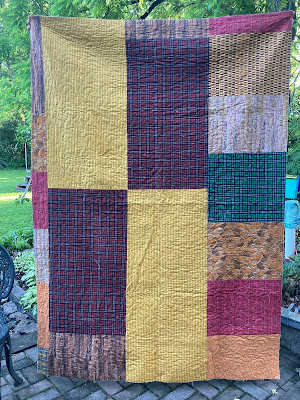
As always, Dorothy made a scrappy back with leftover fabrics.

Friday, December 20, 2024

Ramona's Nauvoo Quilt Christmas Gift


Quilt made from the Robert Kauffman Nauvoo Temple panel with several borders to give to my sister, Ramona for Christmas this year.

Summer of 2023 I visited Nauvoo Emporium Quilts and More in Nauvoo, IL and bought a quilt kit of many sites in Nauvoo with a large Nauvoo Temple panel for the center.


Before doing the large, more detailed and time consuming quilt, I quilted just a Nauvoo Temple panel quilt to practiced. I had fun quilting it to death.


You can see from the photo of the back the detail of what I did. Lots of thread color changes all Glide thread. Glide 60 Sterling for the back.

Wednesday, December 18, 2024

Making a Laundry Bag - Tutorial


This is a laundry bag made for my daughter many long years ago. I was using fabric I had on hand, and she wasn't too thrilled at the bright, bold fabric, so we switched it and made it with the wrong side of the fabric out (as if it were the right side) to give it a subtle plaid look. She like it better, but it can make the instructions a bit confusing as it looks backwards from what is normal.


*****I didn't take a picture of cutting out the fabric, but they are cut the size you want the finished piece plus seam allowances. ********

There are many sizes of laundry bags. This one finishes at 25"x30". Another size I've made is 26"x44".
Allow 3/4" for each french seam (sides and bottom)
Allow 1-1/2" for the top seam

I chose to do french seams for two reasons, durability - since each seam is sewn twice and protecting the seams so they don't fray. To do this, I sewed the pieces with RIGHT SIDES TOGETHER at 1/4" (remember the white side is my "right side"). Then turn it inside out, pushing the corners out nice and square and the finger press the seams close to the stitching, and sew 3/8" from the edge. This will keep the raw edges inside. See below.


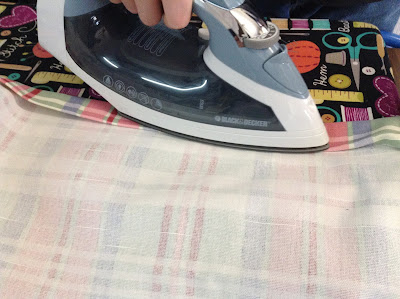
Next will be preparing the casing at the top. I press the edge down 1/2" from the top. I have found for long areas that need a precise fold, I cut a strip of card stock to the correct width, (in this case, 1/2"x11") and press the cloth over the strip of card stock.


You can see it better in this picture. I line up the edge of the fabric with the edge of the card stock, keeping the folded edge snug to the card stock.


Then fold again and press 1" from the first fold. Here I have a 1" strip of card stock that I tuck into the 1/2" fold and fold again, giving the casing area a very crips and exact measurement.


Before you sew the casing closed, we need a hole to put the string through. I used a grommet, though if that's not to your liking, you could use a buttonhole or some other method.


Center the grommet in both the front and within the 1" part of the casing. Draw a circle in the center of the grommet (see below).


Cut a little snip in the middle. . .


to get your scissors inside to cut out the circle.


Very carefully cut out the center. I go a wee bit inside that line. . .


 because I want the grommet to be nice and snug in that hole.  Secure the grommet according to package directions. If you prefer to have two strings to close the top, repeat making a hole directly across from the first hole centered on the back side of the laundry bag within the casing as before.


Remember that the white side of my fabric is the "right" side (because I know if you're just flipping through the pictures, it's deceptive - it throws me off and I made it). Stitch nice and close (1/8" or less) from that folded edge.


String your string or strings through and you're done.


I've made a bunch of these. Good for teens or college age students that do their own laundry.


I like to embroider the name on it.


I'll be making more this Christmas, too.

Monday, December 16, 2024

Gail's Under the Sea Colored Quilt Top Find


This quilt top was given to me by Gail. Fabric for the back was leftover from a charity quilt I finished from Cynthia. My Aunt MaryEllen fell in love with the colors and gushed over it recently.


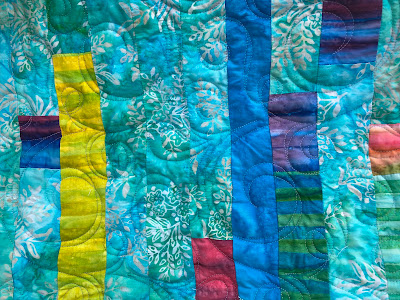
I quilted it with the Espresso pantograph from Urban Elementz.


Back and Front respectively.

Monday, December 9, 2024

Fiona's Mini Tree Skirt


This makes me so happy! My daughter was on a mission trip in Alaska last Christmas. Shipping was expensive and her space was very limited, so we put together a little 12 days of Christmas care package. On the first day of Christmas she got a small tinsel tree. Each day thereafter had either small decorations for the tree or her apartment (you can see some snowflakes for one of the days). One thing on day one, two things on day two, etc. I don't remember what day she got the tree skirt, but it was my favorite part. It is a mini version of our tree skirt at home with my kids' handprints on in. This was done with stamps.

Friday, November 15, 2024

Dorothy's Dinosaur Panel Quilt


Dorothy’s one request for me quilting this was that the thread color blended or disappeared (as much as possible) with the dinosaurs.


After laying out many options, I went with the Glide Light Tan on the top and Mocha on the back.


I used Urban Elementz “Time Warp” pantograph, which I found perfect, not only in style but in name as well.

Tuesday, November 12, 2024

Dorothy's Second Space Quilt


When Dorothy made another space quilt, I knew I would quilt it the same as the first.


The Starlet pantograph from Urban Elementz seems to have been made for this.


Military Gold Glide/Glide 60 threads both blend and contrast perfectly on the front and back.

Saturday, November 9, 2024

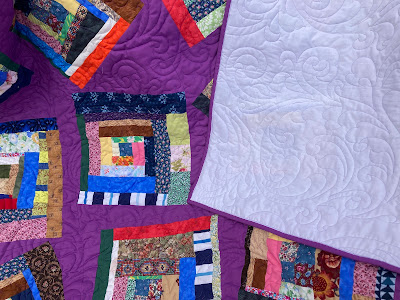
Wonky Log Cabin Scrappy Purple


I made this scrappy quilt to go to charity. The top, I made a couple years ago and quilted it earlier this year.


I used the Baroque Filigree pantograph I designed with Grape Glide thread on the top and Purple MicroQuilter thread on the back. The polyester batting gives it great loft.