Emerald made 2 year old Alexander this quilt for Christmas. He loved certain zoo animals, vehicles, and trains, so with my embroidery machine, we embroidered his favorite zoo animals, cars, and trucks on to the white squares. Then she designed and appliqued the train in the center. One of the great things about this quilt is that it was all made from fabric in our stashes. Love that! (Sorry the lighting was weird in the room).
Pricing
Long Arm Quilting/ Sewing or Quilting Lessons / Custom Made Items
I am a long arm quilter with rates starting at $.02/square inch. Most edge to edge designs are $.025/square inch. My prices include set up, thread, needles, etc. I make commissioned quilts with rates at $25/hour.
Thursday, October 18, 2018
Alexander’s Train Quilt
Emerald made 2 year old Alexander this quilt for Christmas. He loved certain zoo animals, vehicles, and trains, so with my embroidery machine, we embroidered his favorite zoo animals, cars, and trucks on to the white squares. Then she designed and appliqued the train in the center. One of the great things about this quilt is that it was all made from fabric in our stashes. Love that! (Sorry the lighting was weird in the room).
Tuesday, August 7, 2018
Making Curtains - Tutorial
My sister asked me to make curtains. Here's the basics of how to make a curtain. First, figure out the size needed by measuring the window. How much do you want it to hang below the window? What's the overlap on the outsides of the window? How much gather do you want when the curtains are closed? Ultimately you can decide for yourself what you like.
1. The white lining fabric is the exact size that the curtains will be. I have allowed 1" on each side for seams and 4-1/2" at the bottom and 2-1/2" at the top for a 1-1/2-2" rod pocket. If you would want that ruffle at the top above the rod pocket, add 2-4" to that figure (depending on how much ruffle you want). This was not what my sister wanted, so we left that off.
2. As much as I hate ironing, it will make this whole thing much easier. Fold and iron 1/2" on all edges.
3. Next, carefully place and pin the lining to the curtain fabric, wrong sides together. If you cut and ironed precisely, the raw edges of the lining should just touch the raw edges of the curtain fabric on each side.
4. Fold and iron the side seams over the lining 1". Pin in place.
5. Then sew close to the inside folded edge. Repeat for other side.
6. If you haven't done so yet, iron 1/2" from raw edge, then fold down 2" (or 4" for the bottom) so that the fold is where the liner begins. Iron, pin and sew as you did for the sides. Top is shown here, but the same applies to the bottom hem as well.
If you want a ruffle at the top, you will need a 4" fold from the top, then after sewing along the folded edge, closest to the center of the curtain, sew 2" from top and 2" from the seam that you just made, in other words, smack down the center of the pocket you just made.
Here it is finished. Makes the room bright and colorful, that's for sure.
1. The white lining fabric is the exact size that the curtains will be. I have allowed 1" on each side for seams and 4-1/2" at the bottom and 2-1/2" at the top for a 1-1/2-2" rod pocket. If you would want that ruffle at the top above the rod pocket, add 2-4" to that figure (depending on how much ruffle you want). This was not what my sister wanted, so we left that off.
2. As much as I hate ironing, it will make this whole thing much easier. Fold and iron 1/2" on all edges.
3. Next, carefully place and pin the lining to the curtain fabric, wrong sides together. If you cut and ironed precisely, the raw edges of the lining should just touch the raw edges of the curtain fabric on each side.
4. Fold and iron the side seams over the lining 1". Pin in place.
5. Then sew close to the inside folded edge. Repeat for other side.
6. If you haven't done so yet, iron 1/2" from raw edge, then fold down 2" (or 4" for the bottom) so that the fold is where the liner begins. Iron, pin and sew as you did for the sides. Top is shown here, but the same applies to the bottom hem as well.
If you want a ruffle at the top, you will need a 4" fold from the top, then after sewing along the folded edge, closest to the center of the curtain, sew 2" from top and 2" from the seam that you just made, in other words, smack down the center of the pocket you just made.
Here it is finished. Makes the room bright and colorful, that's for sure.
Thursday, August 2, 2018
Starry Baby Blanket
Emerald designed and made this baby blanket for a friend. Simple squares and half square triangles, but the colorful background makes it pop.
Tied with yellow yarn. I like the tactile experience for babies since I remember finding comfort in rubbing the ties on my baby blanket. I think the yellow adds to the stars in the sky on this quilt.
For some reason the color is way off on this photo, but yellow binding is machine stitched on using a decorative stitch - stars of course. I like to stitch the binding on by machine for quilts that are going to be used a lot, especially baby blankets that get washed frequently. It makes them hold up better.
Tied with yellow yarn. I like the tactile experience for babies since I remember finding comfort in rubbing the ties on my baby blanket. I think the yellow adds to the stars in the sky on this quilt.
For some reason the color is way off on this photo, but yellow binding is machine stitched on using a decorative stitch - stars of course. I like to stitch the binding on by machine for quilts that are going to be used a lot, especially baby blankets that get washed frequently. It makes them hold up better.
Monday, July 9, 2018
Hey! I made that!
This has happened a few times, where I was searching on the net or a fabric store sent me a link to their site with a photo attached and I do a double take. "Hey! I made that!!!" Here's one I ran across a few years ago on the fabric.com site, and I snapped a picture with my phone of the computer screen. I had forgotten all about this since it was before I started blogging. Kinda fun.
Monday, June 18, 2018
Little Boys Button Down Shirts
Here are some shirts that Emerald made back in 2016 for Trenna Travis Design Studios for the release of the Michael Miller fabrics Tundra and Little Bears. The pattern used was a Burda Style model #139, style 09/2015.
Up close on the fabrics and the pattern.
Up close of the little welt pockets. So cute!
Wednesday, May 30, 2018
Pillows
More pillows made for Michael Miller Fabrics back in 2016 using the fabrics called "Chase" and "Little Bears" in two different colors.
Wednesday, July 20, 2016
Friday, June 24, 2016
Blooming Border skirt - Trenna - Tutorial
For the March 2016 Michael Miller photo shoot, I made this beautiful skirt from the fabric "Blooming Border." It was loosely based on the Vogue pattern V8980, with many variations - really the waistband and length is what I used. I'll walk you through what I did, sorry I didn't take more photos of the actual process, I wasn't planning on doing a tutorial. I took a few pictures of make shift examples, but know that they are not true representations.I no longer have the pattern, it was returned, but if I remember correctly, this pattern had two larger than quarter circle pattern pieces for the front to give the fullness, and the back two pieces were more A-line in appearance with the waistline gathered. Well, as you know, cutting a circle out of border fabric will not work to have the pattern along the bottom.
What I did is take one of the back pattern pieces and folded it in half lengthwise (thirds, or quarters are also options). (Folded side of the pattern piece in photo is on the right side).

I added the seam allowance along the folded side and cut out 8 quarters skirts panels. If you'd like it fuller than that, you can always cut more panels. I can't remember for certain, but I may have cut 12 or even 16 panels to make it extra full.
*If you have a fuller pattern (like my makeshift pattern piece in the photo above), you could cut the piece into thirds or quarters. Just make sure you have seam allowances on both sides.
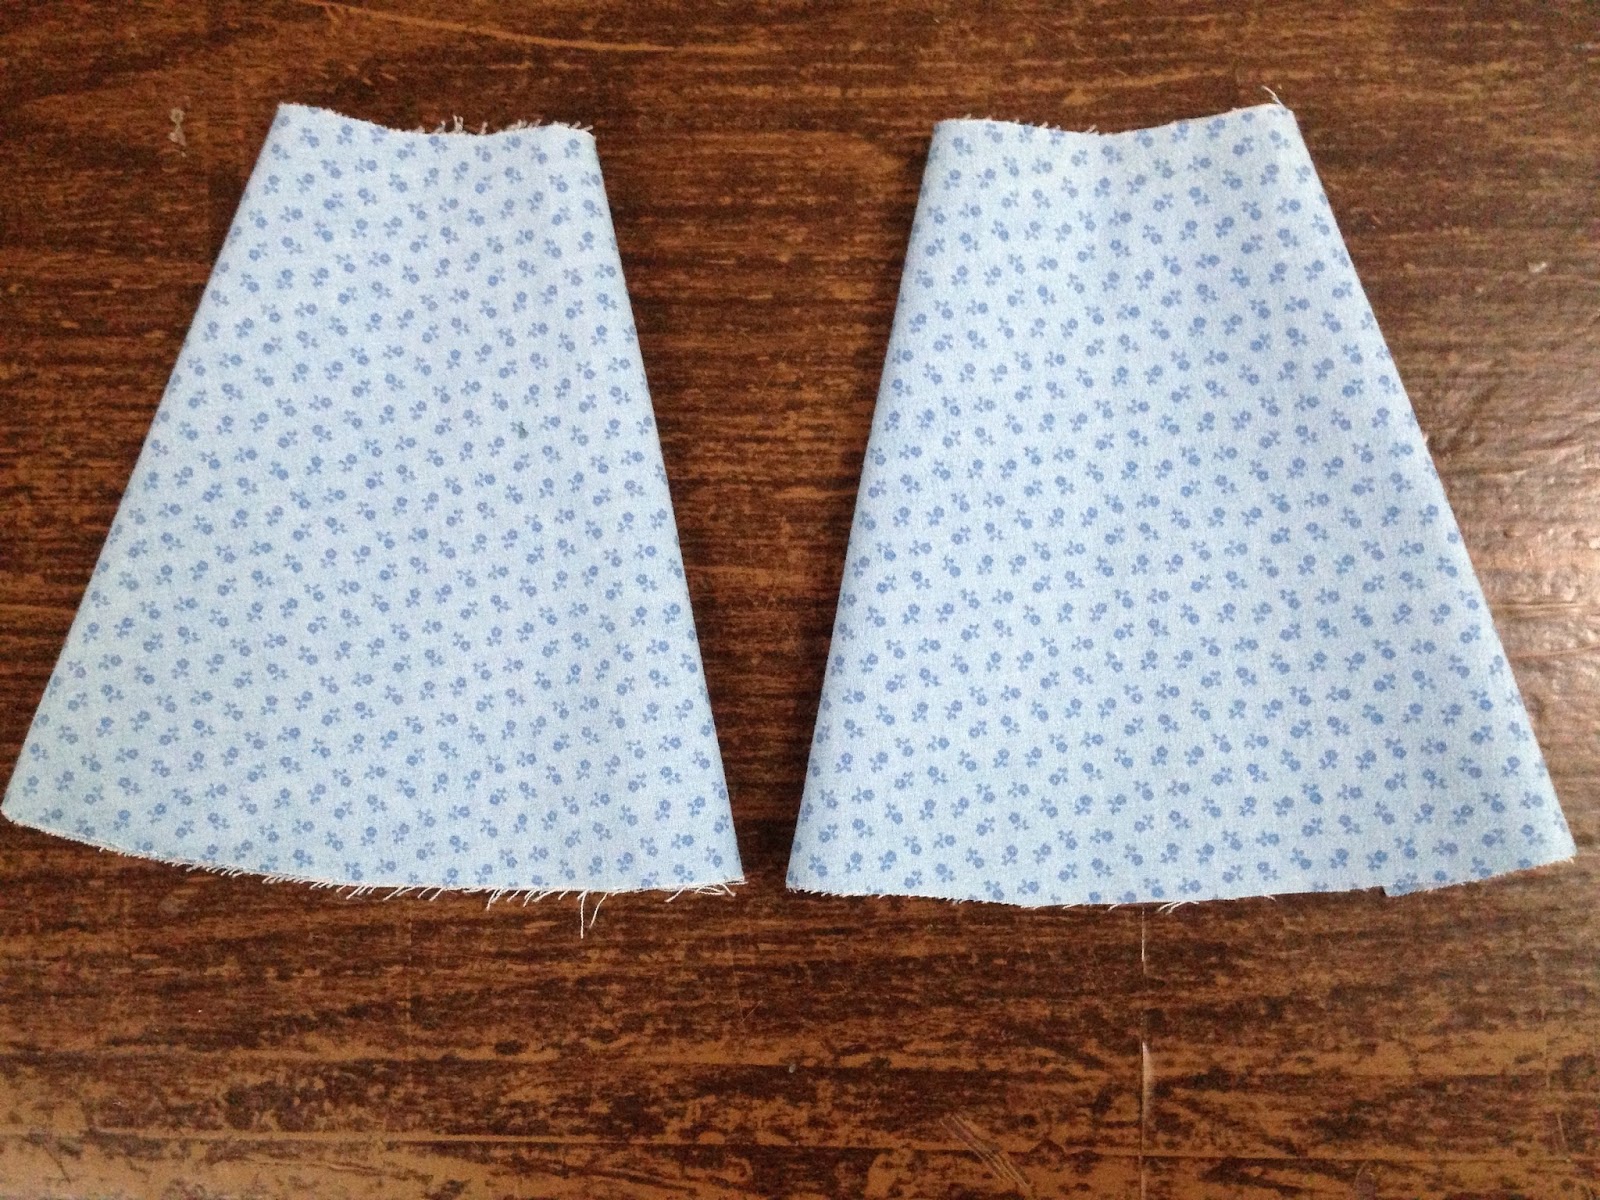
Your skirt panels will look more like the two pieces in the top photo, rather than the one in the bottom photo.
The key is you want to make the skirt panels so the bottom edge of the skirt is straighter so the printed panel on the fabric is seen as much as possible.
In this top picture, the border would loose very little of the pattern on the sides whereas the picture on the bottom would loose a great deal.
One more thing, for best results, try to make sure the stripes (or design) is lining up in the same place on the pattern. I don't want my stripes to jump up and down, drawing attention to the fact that the skirt is pieced and not printed in a circle.
Next, I lined up the panels to try make the floral pattern flow. One might think that you just put it in the order you cut it out from the fabric, and sometimes that works. For this skirt, it didn't. The floral design was large enough and the stripes prominent enough, that I actually laid it all out and matched one to the next, remembering that a little bit would be taken out from each side for seam allowances.
Now the pleating. This is one of those things where the explanation sounds worse than it is. I started in the center front. In the photo, you can also see that the size of tuck I took was based on where the seams were. I wanted all the seams to be less visible, so all the pleats are on top of the seams to help hide/disguise them.
The waistband, I used the pattern as a guide. It's normal ruching. Questions, please e-mail me.
Tuesday, May 24, 2016
Baby Dress, Blanket and Pillows, All in White - Trenna
In January 2016, I was asked to make several items all in Michael Miller's white Cotton Couture fabric. There were 3 - 18"x18" pillows with trim, 5 - 20"x20" pillows with piping and one without piping, 2 euro pillows (26"x26"), 1 - 36"x36" blanket with a ruffle around it, a 8"x12" pillow with a ruffle (no photo), and a ruffled baby dress made with Burda easy pattern #9802.


Monday, May 16, 2016
Subscribe to:
Posts (Atom)