Pricing

Long Arm Quilting/ Sewing or Quilting Lessons / Custom Made Items
I am a long arm quilter with rates starting at $.018/square inch. Most edge to edge designs are $.021/square inch. My prices include set up, thread, needles, etc. I make commissioned quilts with rates at $20/hour.
I also teach Private Sewing Lessons in the St. Louis area. Cost is $50/hour.
Please e-mail me with any questions, to have your quilt top quilted, to set up sewing lessons, or regarding having something custom made, at showmesewing@gmail.com.


Wednesday, July 20, 2016

Bloomers Market Bag - Trenna


Here is a market bag made from Michael Miller's "Bloomers" on the outside and  lined with the "Pom Poms" fabrics.  The pattern I made up, but it's pretty basic - 2 large rectangles sewn together with boxed corners and heavy duty interfacing to give it stability.


Friday, June 24, 2016

Blooming Border skirt - Trenna - Tutorial


For the March 2016 Michael Miller photo shoot, I made this beautiful skirt from the fabric "Blooming Border."  It was loosely based on the Vogue pattern V8980, with many variations - really the waistband and length is what I used.  I'll walk you through what I did, sorry I didn't take more photos of the actual process, I wasn't planning on doing a tutorial.  I took a few pictures of make shift examples, but know that they are not true representations.

 I no longer have the pattern, it was returned, but if I remember correctly, this pattern had two larger than quarter circle pattern pieces for the front to give the fullness, and the back two pieces were more A-line in appearance with the waistline gathered.  Well, as you know, cutting a circle out of border fabric will not work to have the pattern along the bottom.

What I did is take one of the back pattern pieces and folded it in half  lengthwise (thirds, or quarters are also options).  (Folded side of the pattern piece in photo is on the right side).


I added the seam allowance along the folded side and cut out 8 quarters skirts panels.  If you'd like it fuller than that, you can always cut more panels.  I can't remember for certain, but I may have cut 12 or even 16 panels to make it extra full.

*If you have a fuller pattern (like my makeshift pattern piece in the photo above), you could cut the piece into thirds or quarters.  Just make sure you have seam allowances on both sides.


 Your skirt panels will look more like the two pieces in the top photo, rather than the one in the bottom photo.

The key is you want to make the skirt panels so the bottom edge of the skirt is straighter so the printed panel on the fabric is seen as much as possible.

In this top picture, the border would loose very little of the pattern on the sides whereas the picture on the bottom would loose a great deal.
One more thing, for best results, try to make sure the stripes (or design) is lining up in the same place on the pattern.  I don't want my stripes to jump up and down, drawing attention to the fact that the skirt is pieced and not printed in a circle.
 Next, I lined up the panels to try make the floral pattern flow.  One might think that you just put it in the order you cut it out from the fabric, and sometimes that works.  For this skirt, it didn't.  The floral design was large enough and the stripes prominent enough, that I actually laid it all out and matched one to the next, remembering that a little bit would be taken out from each side for seam allowances.

Now the pleating.  This is one of those things where the explanation sounds worse than it is.  I started in the center front.  In the photo, you can also see that the size of tuck I took was based on where the seams were.  I wanted all the seams to be less visible, so all the pleats are on top of the seams to help hide/disguise them.

The waistband, I used the pattern as a guide.  It's normal ruching.  Questions, please e-mail me.

Tuesday, May 24, 2016

Baby Dress, Blanket and Pillows, All in White - Trenna

In January 2016, I was asked to make several items all in Michael Miller's white Cotton Couture fabric.  There were 3 - 18"x18" pillows with trim, 5 - 20"x20" pillows with piping and one without piping, 2 euro pillows (26"x26"), 1 - 36"x36" blanket with a ruffle around it, a 8"x12" pillow with a ruffle (no photo), and a ruffled baby dress made with Burda easy pattern #9802.


Monday, May 16, 2016

Dancing Cats Little Girl's Dress - Trenna

In December of 2015, Trenna asked me to make a baby dress from the Michael Miller fabrics, "Dancing Cats" and "Zipper Stripe."  The pattern I used was Burda Kids #9494.


Wednesday, May 4, 2016

Big Quilt Blocks - Debbie Bowles style

 I watched a Nancy Zieman video where she had a guest, Debbie Bowles explaining her Big Quilt Blocks.  As I watched it, I was struck that that might be the perfect block for some paneled fabric one of my sisters gave me.  There were 18 panels and I had thought to make a twin size quilt top with it, but as I began the planning, it occurred to me that if I made 3 baby quilts, it would divide more evenly (I wouldn't have to come up with 2 more big block centers to make the 4x5 blocks needed for the twin).  Plus, it would give me 3 quilts instead of one to practice longarm quilting on . . . when I get it . . . in another 3 years or so.


  It ended up being a good thing in another way - using fabric that was given to me, there was not enough of the green to do what I had wanted to do with all of the blocks.  I found a nice brown that complimented very nicely and did one with the green frames and two with the brown.  However, I ran out of the blue that was between the panels, that I was using to make those panels just a wee bit bigger so that it was the full 12.5" squares needed.  So on the one with the green frames, I used the brown, but on the one with the brown frame, I didn't want to use the brown again, so, I used the tiny scraps of the green I had left to frame one of the blocks.  A great lesson in "making do." ;-)

Friday, April 29, 2016

Matching the pattern - Tutorial

Have you ever had to sew two pieces of fabric together in such a way that the pattern matches up so the seam is practically invisible, but was unsure how?  Well, here's how I've found works best for me.

I'm making my son a quilt that matches his baby blanket and have decided to quilt it based on the swirls on the back fabric.  But that means that the backing needs to have the swirls match up or it will be difficult to have the quilting work out.


 Here's what I do:
 1.  Take the two pieces of fabric, A and B.  After laying out the fabric and determining where the pattern matches, trim fabric A on the edge that will match up with the pattern on fabric B, don't trim B yet.  In this case, I'm leaving a half inch seam allowance.  I find it easier to work with in this kind of thing and it can be trimmed at the end, if necessary.  Then fold and iron the seam allowance on side A only.


2. Lay out fabric B on a nice flat surface (floor).  Lay fabric A on top of fabric B where the patterns match up.  Pin as you go, carefully lining up the pattern a few inches at a time.  You can see in the picture that fabric B's seam allowance is too large.  That's OK.  Just match up the pattern.


Below you can see how the pattern matches, looking specifically at the seam allowance on A and matching the pattern with the extra large seam allowance on B.

Note: Unless you find the specific print on the fabric (matching the printing on the selvage edges, etc) the pattern may not match perfectly as you might notice in my case, but for the back of his quilt, this was good enough.


3. Open up your seam allowance on fabric A and sew carefully along the crease line.


4.  Flip it over and check to see that things line up properly.  If there are any areas that need to be unpick and redone, now's the time to do that.
 5. Now its time to trim off the excess seam allowance on fabric B.  Lay the fabrics flat and trim off seam allowance.  I'm left handed so that's why it's set up for a lefty.  If you're right handed, turn the fabric the other direction.


6. Press seam allowances, for quilt backs, I prefer to press them open.


And there it is.  The seam is where my foot is pointing to it.  Yes, you can see the seam if you look because fabric prints are not all identical, but this will make it so my quilting pattern matches up well enough.


Wednesday, April 27, 2016

Xander's Quilt

If you don't take pictures of the things you make, eventually, you will forget.  I was chatting with a friend that had moved away on Facebook.  She mentioned the quilt I had made for her son, Xander.  I said I had forgotten about it and couldn't remember what it looked like.  She kindly sent me a picture so that I could post it here.  Thanks, Amey!

Wednesday, April 20, 2016

Quilting - the difference an exact 1/4" seam makes

I posted a while back how I was taking 1" scraps of fabric and sewing them together to make a quilt out of scraps - scraps that others had/would throw away.  I am making it while working on other projects.  I sew the scraps as "leaders" or "enders" while chain piecing.

I have a quarter inch foot, that I sometimes use, but when I used it to sew some of the strips together, discovered that the manufacturer of this sewing foot doesn't know what a true 1/4" is.  Look at the difference it makes when put next to another rectangle that is supposed to be the same size.  The top rectangle is the correct size, the bottom is almost an inch off!  The seams are just a few threads different,  but it's been a pain to fix this little problem - lots of seam ripping (a task I hate) and resewing.  I had about 30 blocks to fix.  UGH!  Someday I'll feel that my effort was worth it.


Monday, April 18, 2016

The Quilt Fiona made

Based on a quilt kit I saw on Fons and Porter a couple years ago (March 2014) called Calypso Carnival, my 11 year old daughter decided she wanted to make a quilt like it.  I told her to choose fabric from my stash, I didn't want to have to buy anything, and I would help her plan and make it over the summer.  I also said that it would wait to be quilted until I had the longarm quilter that I was beginning to save up for.


We worked on a plan, drawing two possibilities, one on point as is in the kit, and one on the square.  It was a difficult decision for her.  She liked the way the on-point one looked, but I had told her the straight one would be easier to do and for a first quilt, easier is better.  She wisely chose to go easier.
 She worked on it the Summer of 2014 and then stopped when things got busy at the end of the summer and with school.  In February 2015 she began asking to work on it again.  She had a teacher who was a quilter and wanted to finish it before school let out, but I had a lot of sewing to do for Trenna and there were things I told her I'd do to help her out (trimming blocks to an equal size with the rotary cutter), but didn't have time to do it.  At the end of spring break (the end of March), she was able to work on it again. 

She finished it (all except the border fabric that I ended up having to order fabric for - so much for not purchasing any more fabric), just after school let out, about a week into the summer.  Her teacher let us come over to her house to show it to her.  Fiona was complimented on how well her corners matched up.
 Here it is with the border and the colors of the back (the light blue) and the binding (the dark blue).

I'm really proud of her.  That was a lot of work for a 11-12 year old with a mother who's a stickler for matching corners properly. ;-) Don't worry, I helped her with any unpicking she needed to do it right.

Monday, April 11, 2016

Interwoven Bargello Quilt - Tutorial


Based on the lovely quilt I saw on Lorrie Cranor's blog, http://lorrie.cranor.org/blog/2013/03/15/computational-thinking/, I was inspired to make one of my own.  One of my sisters was cleaning out some of the fabric in her sewing room that she wasn't going to use and passed it on to me.  There were a bunch of strips cut that were about 21" long and 2.25" wide.  I don't like waste, but how was I going to use these fabric strips and what had she planned on doing with them?  Should I just make whatever she had planned?

When I asked her, she couldn't remember what her plan had been.  At first I thought I'd just do one of those random strip quilts.  I wasn't in love with the idea, but it seemed a satisfactory way to use all of the strips.  Then I happened across Lorrie Cranor's quilt posted on pinterest.  Now that was an idea I could love! 


I started to do my own figuring, not being the computer techie person, but rather visualizing it and drawing some thoughts on graph paper.  (I have a graph paper quilt for two sizes of quilts I made.  For the smaller one, I cut the 21" strips in half and cut them down to 2" widths).

I figured out how many of each color I needed and made sure I had enough strips of each.  I needed one more color.  I looked carefully at the colors and decided that there was some burgundy in the orange to pink strip.  I had some burgundy in my stash and cut some strips.

When I lay it out on the floor to get an idea of how it looked, at first I was delighted.  I loved the two flowing curves that went in opposition to each other.  I loved the colors my sister had and how they went together.  But the more I looked at it, the more I realized that the burgundy did not fit in.  True the color was in there, but it didn't flow with the rest of the fabric.


 I then inserted a purple and moved the colors around, which fit.  Even though there was no purple in the striped fabrics, the colors flowed and I was again feeling delighted.

My method for putting this together was similar to that of putting together two simultaneous bargello quilts.

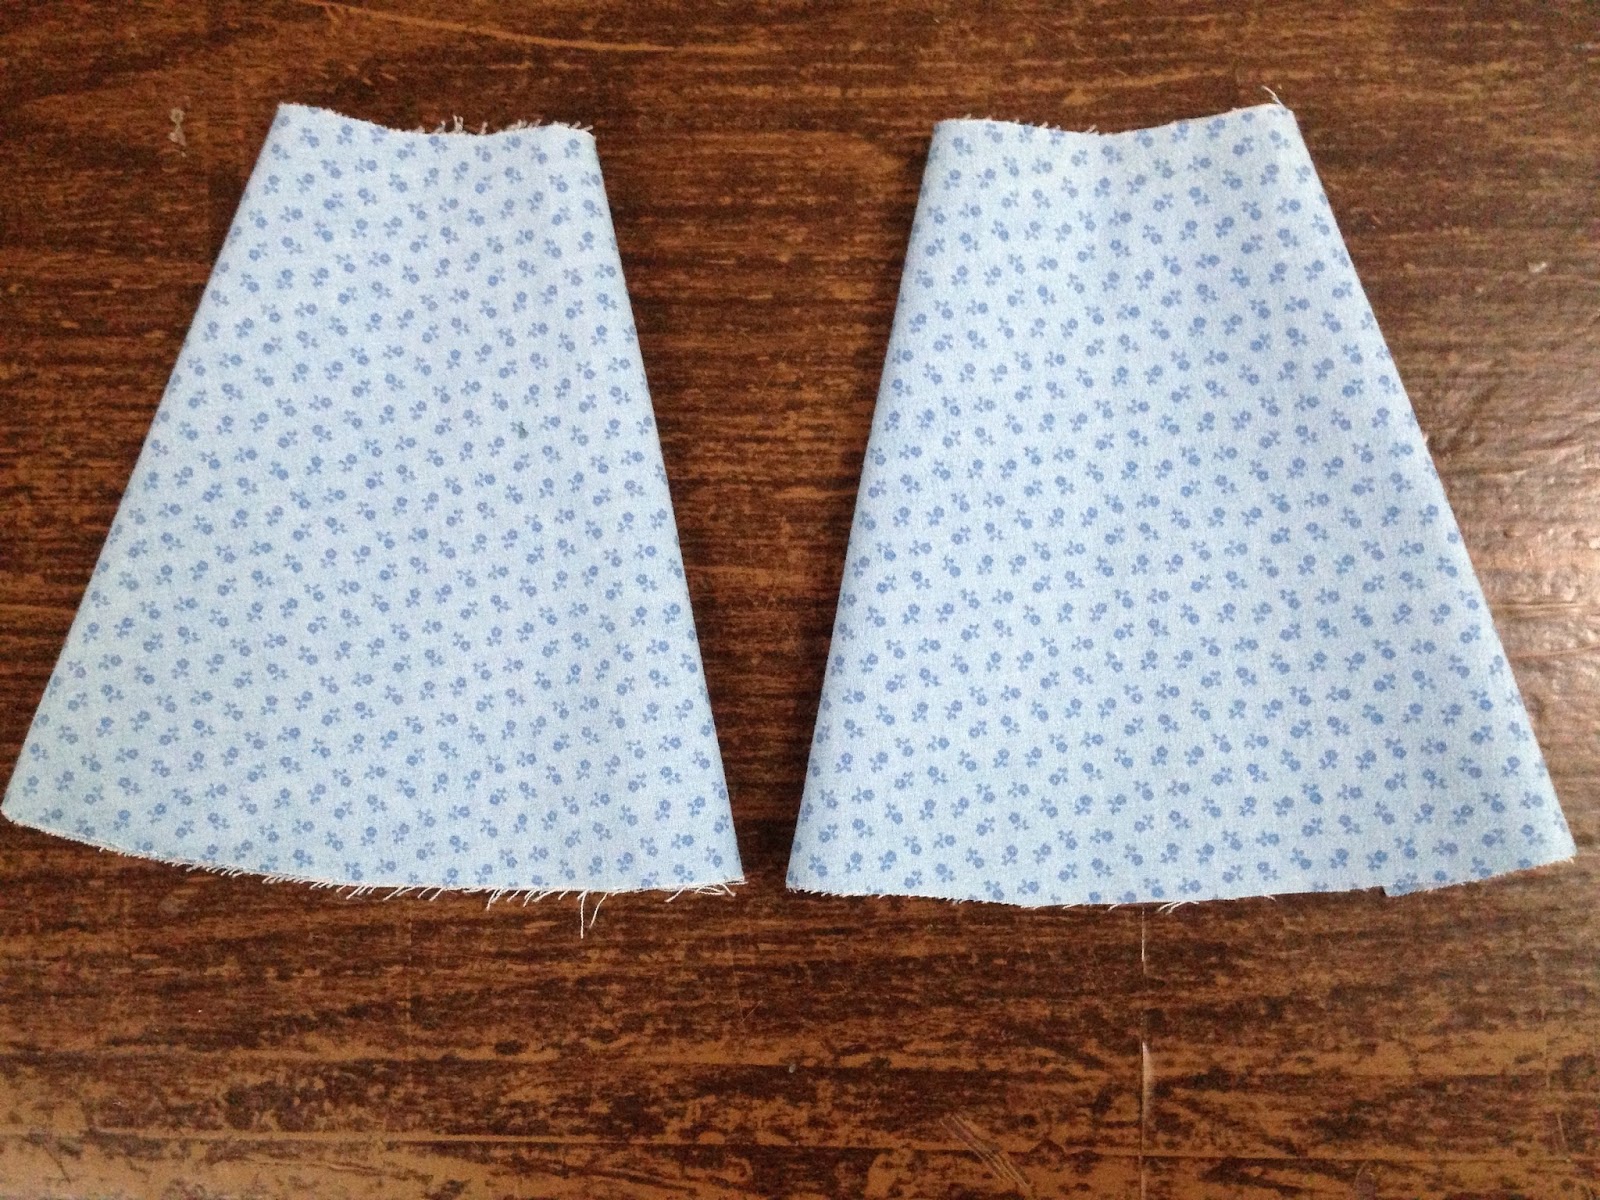
 1. Sew the strips that will be in one row into a loop, taking care that the colors are in the correct order.  In this case, it's the striped pink/orange, purple, striped green/blue, and yellow.


 2. Do the same with the other series of colors.  In this case, green, blue, pink and orange.  Stack them like this.  I have the color that will be cut in two on the left hand side.
 3. Now we need to cut the yellow and orange.  Measure carefully according to your plan.  In this case, the orange will be 2.25" on the pink side and 8.25" on the green side.  Crease the fold and hold carefully so that it doesn't slip.
 4. Cut carefully along the fold.
 5. Repeat for each loop taking care to have the correct number of each one cut at the different lengths.  I have several of each length.  The different lengths of yellow and orange increase by the same amount - 1.5".  The amounts are written on my graph paper with tallies as to how many of each I need, so I don't mess up. 2-1/4, 3-3/4, 5-1/4, 6-3/4, 8-1/4.  You can see that where the orange is 2-1/4 on the pink side, it's going to be 8-1/4 on the green side and when it's 8-1/4 on the pink, it is 2-1/4 on the green.  Yes, the middle one is cut directly in half.
 6.  Then begins the sewing process.  Now, if I had a design wall, or floor space that people didn't walk on, I could lay it out and pick up two pieces at at time to sew and keep things in order that way, but I don't.

Again, relying on my graph paper sketch where I have each size of row numbered.  I see that I need to pick up a #4 pink and sew it to the top of a #3 pink/orange.  Keep repeating until you have all the strips sewn to their next door neighbor.

7.  Lay them out in order.  For lack of floor space, I stack my pieces in such a way that I can keep them orderly and can pick up the right number of pieces at a time.

 8. Sew the pieces together.  I ironed the seams opened, figuring I'd try the way that some prefer - you never know if one way is truly better unless you give it a shot.  I'm not sold on it.  I'll stick with pressing my seams to the side.


9.  Continue sewing strips together, laying it out as needed.  You get the idea of where this one is going.


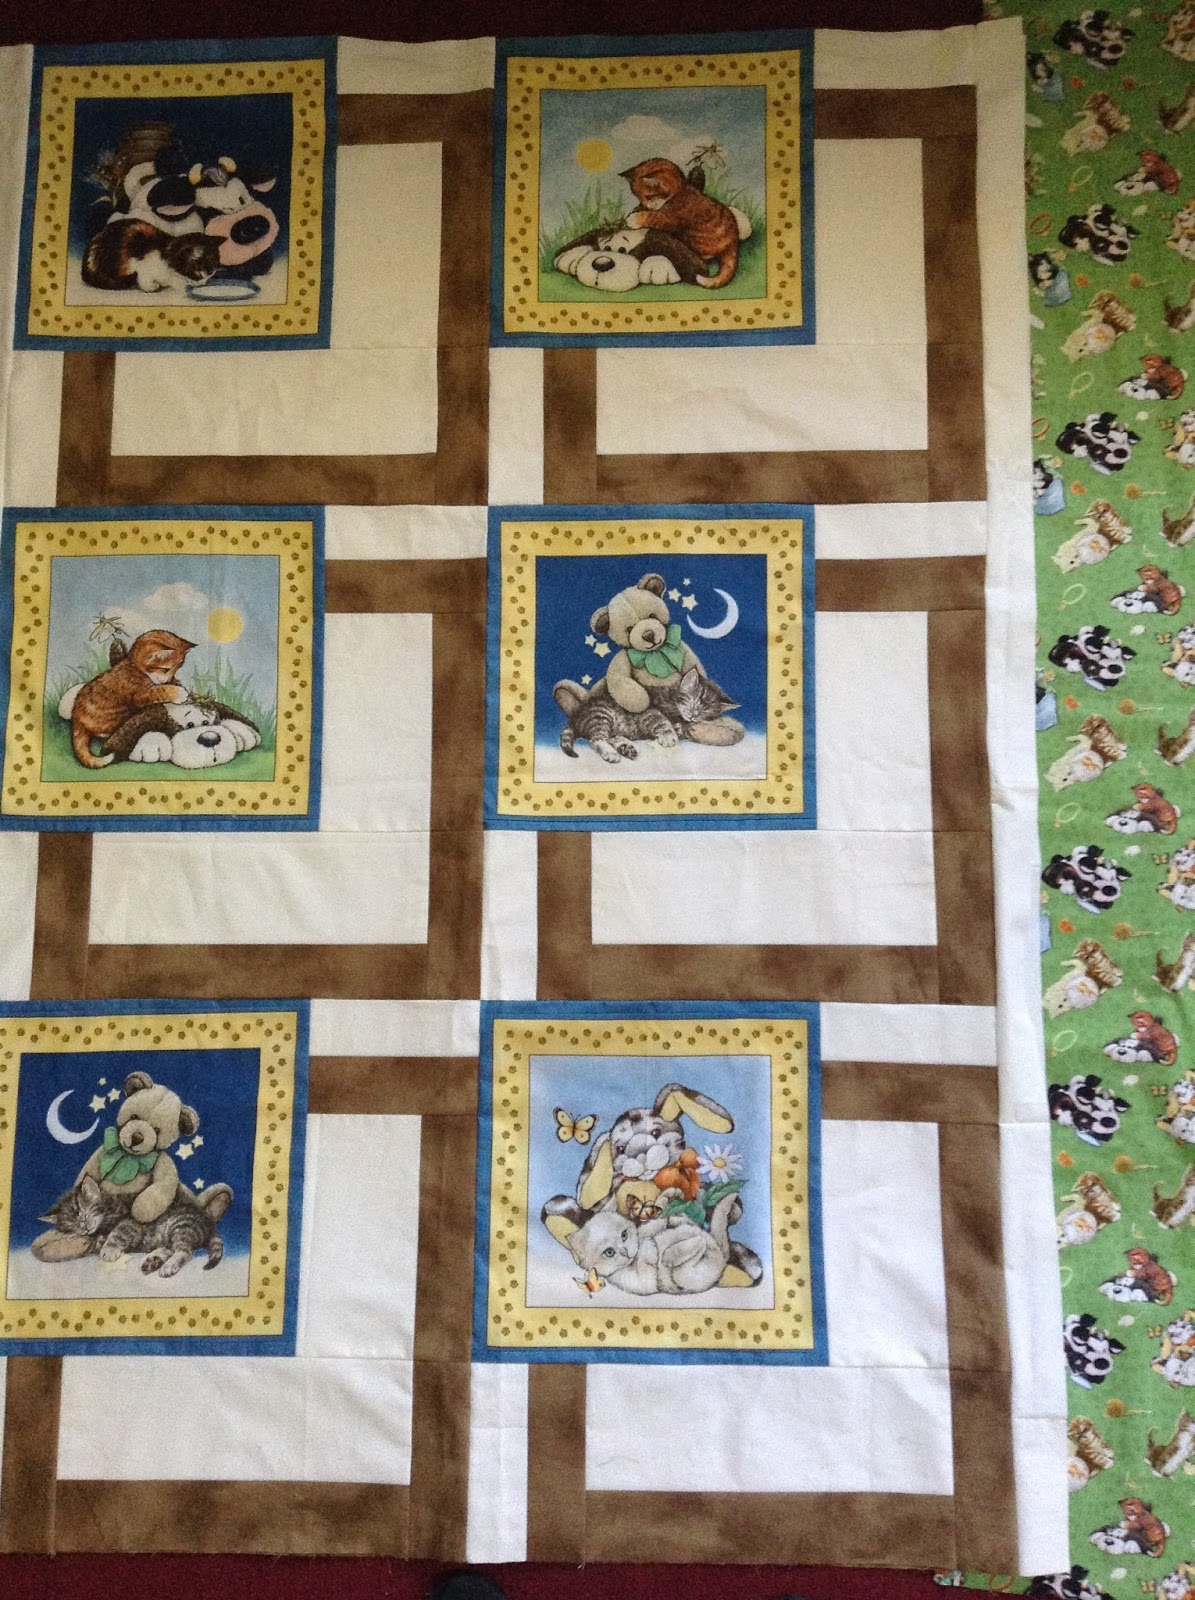
 10.  Back to the large one which I made first.  Once I had the quilt top put together, I figured I'd use those burgundy strips as the border.  I sewed them on.  Again, after looking at it a few days, I decided I had again made a mistake.  *SIGH*  Off they came and a new border was constructed.  I loved the big quilt so much that I then planned and made a baby size quilt to match that would help use up the rest of the strips my sister had given me.  I also thought to put together a tutorial for the second one.  The concept is the same for both.


Here is the final quilt top with the borders that matched.  Draping it over the couch  made it so I could almost take a picture of the whole thing, so I did it in two parts. ;-)